
Introduction
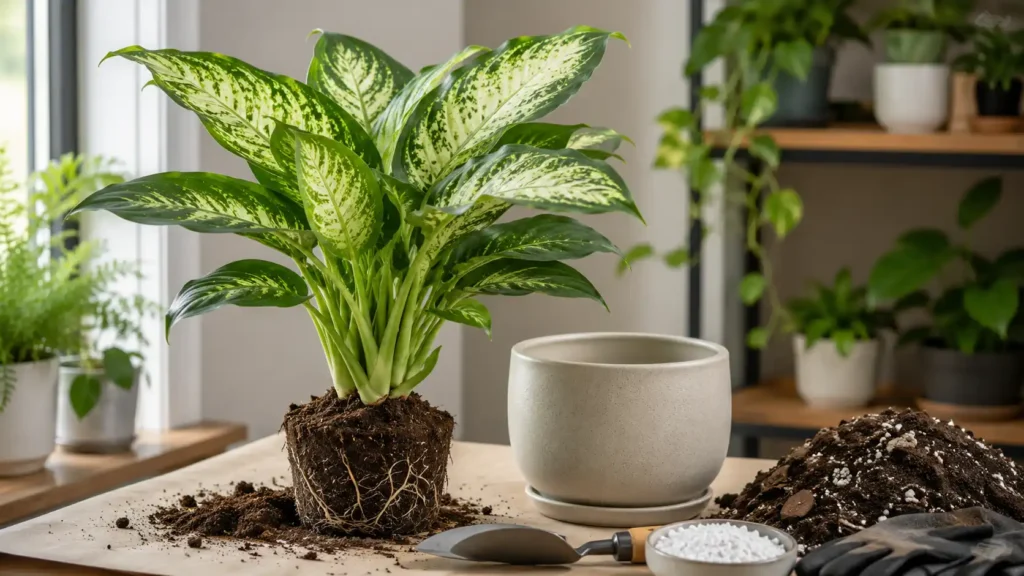
Repotting Dieffenbachia means transferring a dumb cane plant into a new container with fresh growing medium to provide more space, better drainage, and improved root health. Learning how to repot Dieffenbachia properly helps prevent root problems and supports stronger leaf growth. Dieffenbachia plants usually need repotting every 1–2 years or when roots become crowded. The best time for repotting Dieffenbachia is during active growth in spring or early summer when the plant can recover faster. A suitable pot, well-draining soil, and careful handling are the key factors for successful repotting. For more detailed information about different houseplants, growing methods, and plant care practices, explore our complete Plants Benefits and Guides resource.
Quick Summary
- Repot Dieffenbachia every 1–2 years or when roots become crowded, preferably in spring.
- Use a well-draining soil mix and choose a pot only 1–2 inches larger than the current one.
- Water lightly after repotting and keep the plant away from harsh direct sunlight during recovery.
- Avoid deep containers, compact soil, and aggressive root disturbance.
When Should You Repot Dieffenbachia?
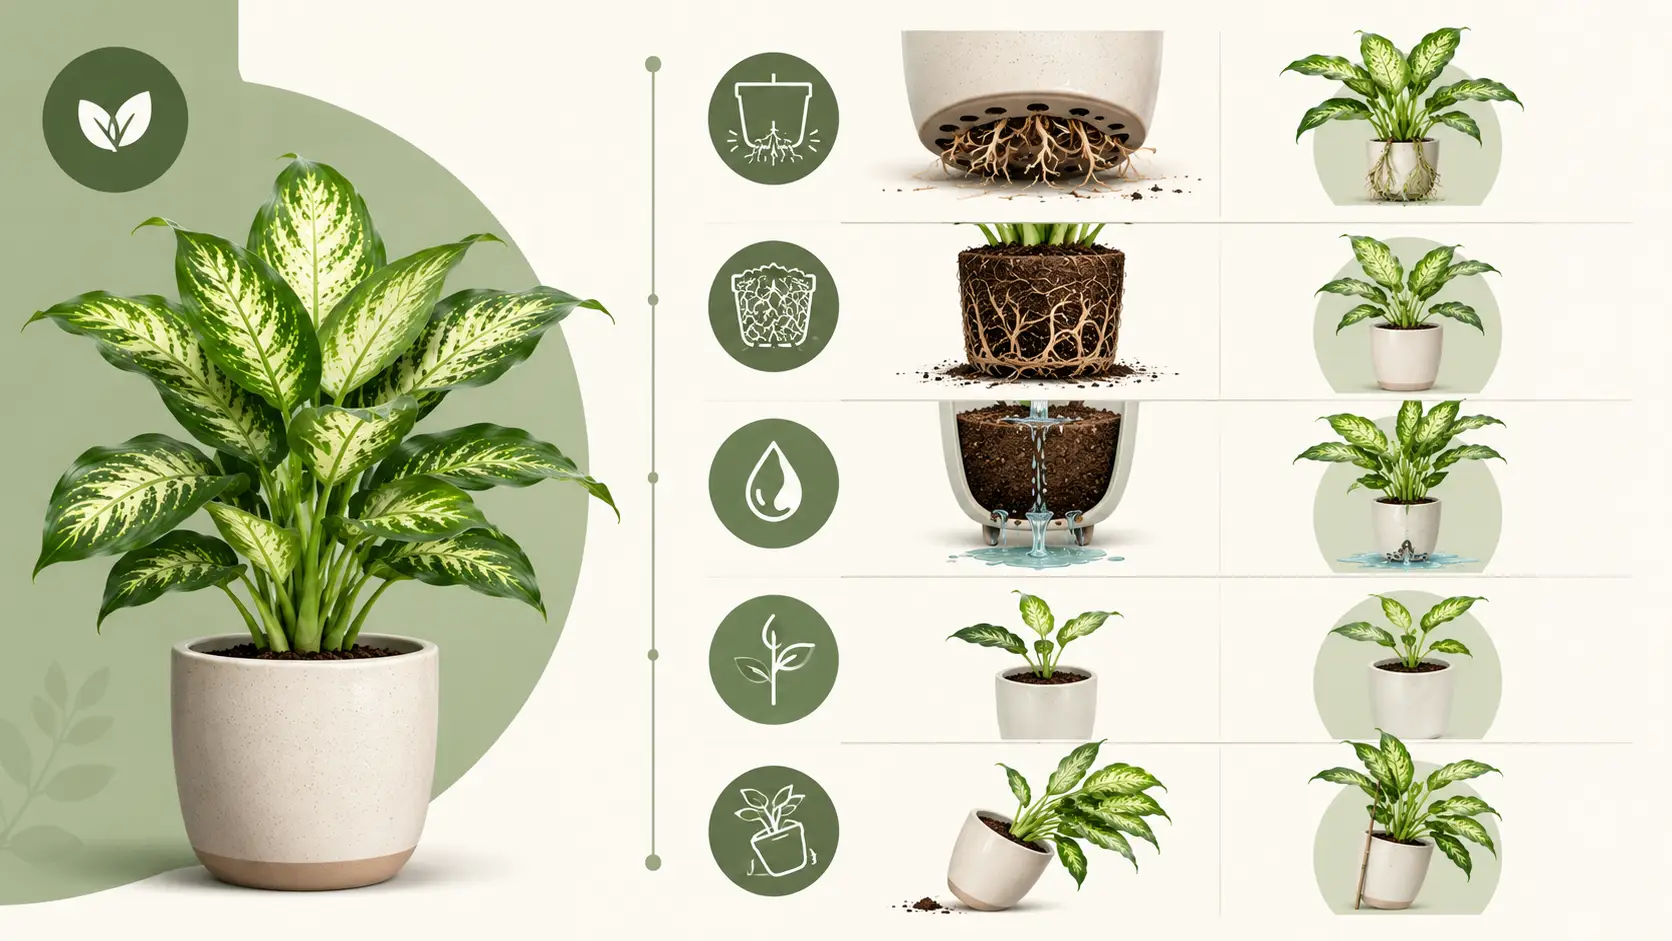
Dieffenbachia should be repotted when it becomes rootbound, outgrows its container, or shows signs that the existing soil and pot no longer support healthy growth. Most plants benefit from repotting every one to two years, although faster-growing plants may need attention sooner. Many tropical houseplants, including Begonia Maculata, also benefit from timely repotting when roots become crowded and growth slows.
The ideal time for when to repot Dieffenbachia is spring or early summer because the plant is entering its active growth period. During this time, roots recover more quickly after disturbance.
Common signs that indicate it is time to repot include:
- Roots growing through drainage holes
- Roots circling tightly around the inside of the pot
- Water flowing straight through without soaking the soil
- Slower-than-normal growth
- Yellowing leaves caused by poor root conditions
- A top-heavy plant that easily tips over
Signs Your Dieffenbachia Has Outgrown Its Pot
A Dieffenbachia that has outgrown its container often shows visible stress. The plant may become unstable because the leaves and stems are larger than the root system can support.
To inspect the roots:
- Gently remove the plant from its pot.
- Check whether roots form a dense circle around the soil ball.
- Look for tightly packed roots with little visible soil.
- Confirm whether drainage holes are blocked by roots.
Healthy roots should appear firm and spread naturally through the soil. Severely tangled roots may require gentle loosening before placing the plant into a new container.
Choosing the Right Pot and Soil
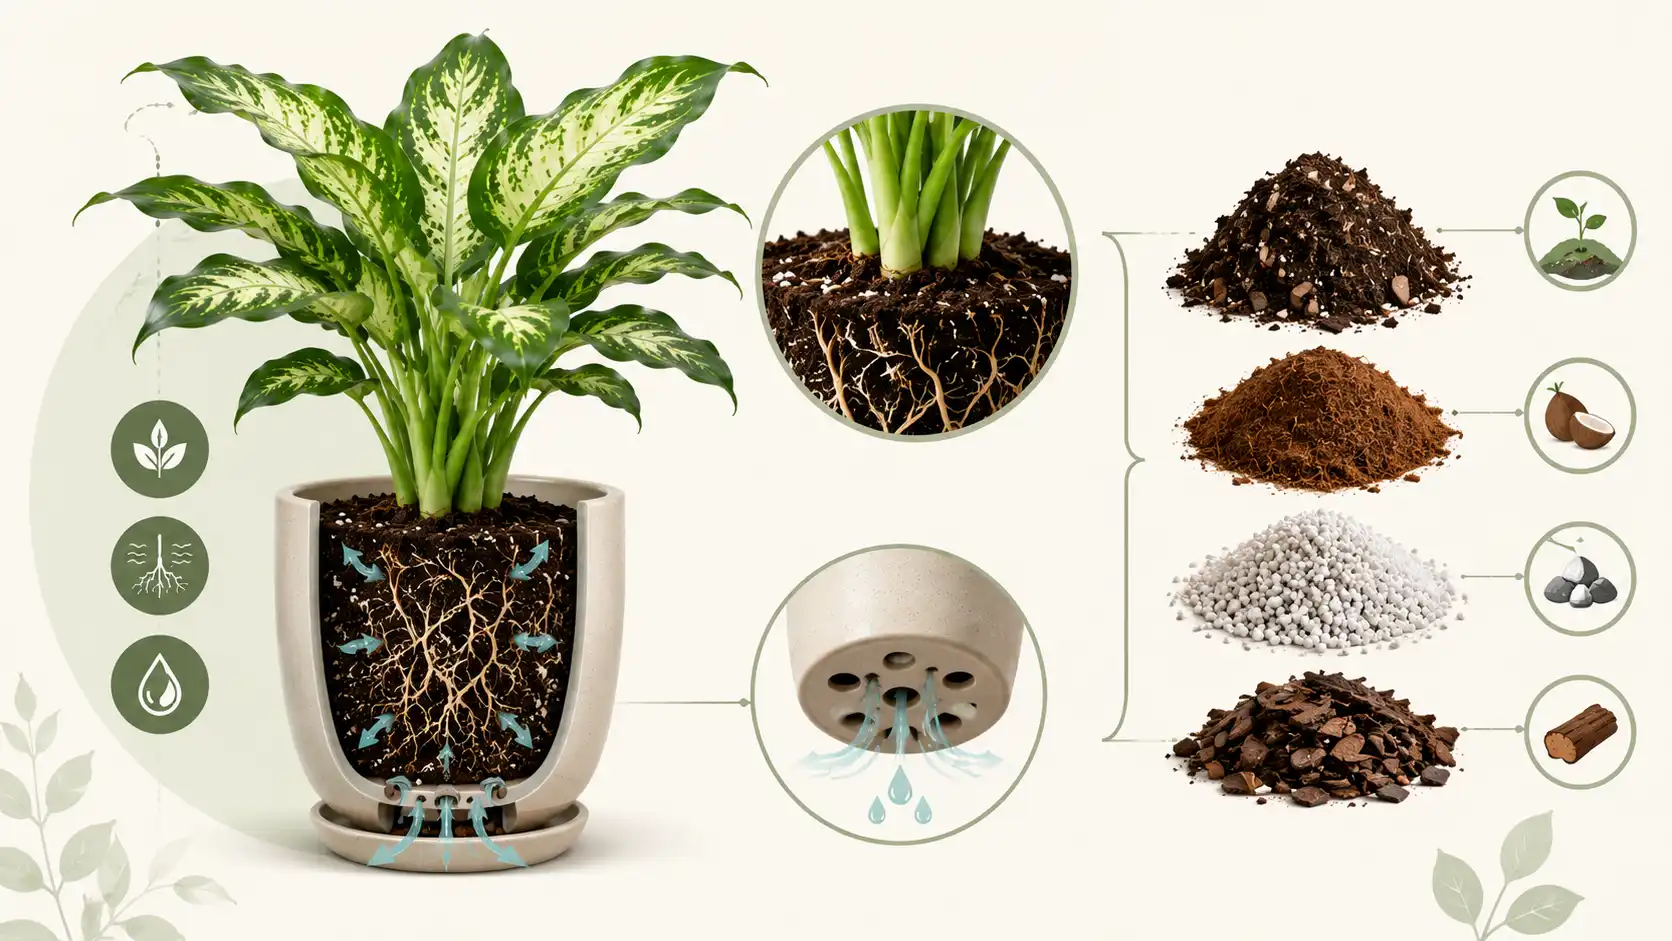
The best pot for Dieffenbachia should provide proper drainage and enough room for gradual root expansion. Dieffenbachia does not require an oversized container because excess soil can retain water and increase the risk of root rot. Like Dieffenbachia, other tropical indoor plants such as Alocasia also require a well-draining soil mix and careful watering practices to maintain healthy roots.
The best potting soil for Dieffenbachia is a loose, nutrient-rich mix that balances moisture retention with airflow. The plant prefers slightly moist soil but does not tolerate constantly wet roots. If you’d rather cross-check soil ratios and pot-size numbers instead of eyeballing them, we’ve organized this data into a free houseplant repotting reference on GitHub. It lists ideal soil mix ratios and pot-size upgrades for Dieffenbachia and other common indoor plants side by side.
Ideal soil components include:
| Soil Component | Purpose |
| Peat moss or coco coir | Retains moisture while keeping soil lightweight |
| Perlite | Improves drainage and prevents compaction |
| Pine bark | Adds structure and increases aeration |
| Quality potting soil | Provides nutrients and a stable growing base |
A pot with drainage holes is essential. Terracotta pots allow faster evaporation and can help prevent overwatering, while plastic pots retain moisture longer and are lightweight.
Do Dieffenbachia Need Deep Pots?
No, Dieffenbachia do not need deep pots. A moderately deep and slightly wider container is usually better because the plant has a moderate root system rather than extremely deep-growing roots.
A very deep pot can hold excess moisture in the lower layers, increasing the chance of root problems. Choose a container only 1–2 inches larger in diameter than the current pot.
What to Put in the Bottom of the Pot
Modern gardening practices generally do not recommend adding a thick drainage layer of gravel or broken pottery pieces at the bottom of indoor plant pots. These materials can reduce the amount of usable soil space and may not improve drainage.
Instead:
- Use a pot with proper drainage holes.
- Use a well-aerated soil mix.
- Place a mesh screen over drainage holes if needed to prevent soil loss.
The most important factor is the quality of the growing medium, not a separate drainage layer.
Step-by-Step: How to Repot a Dieffenbachia
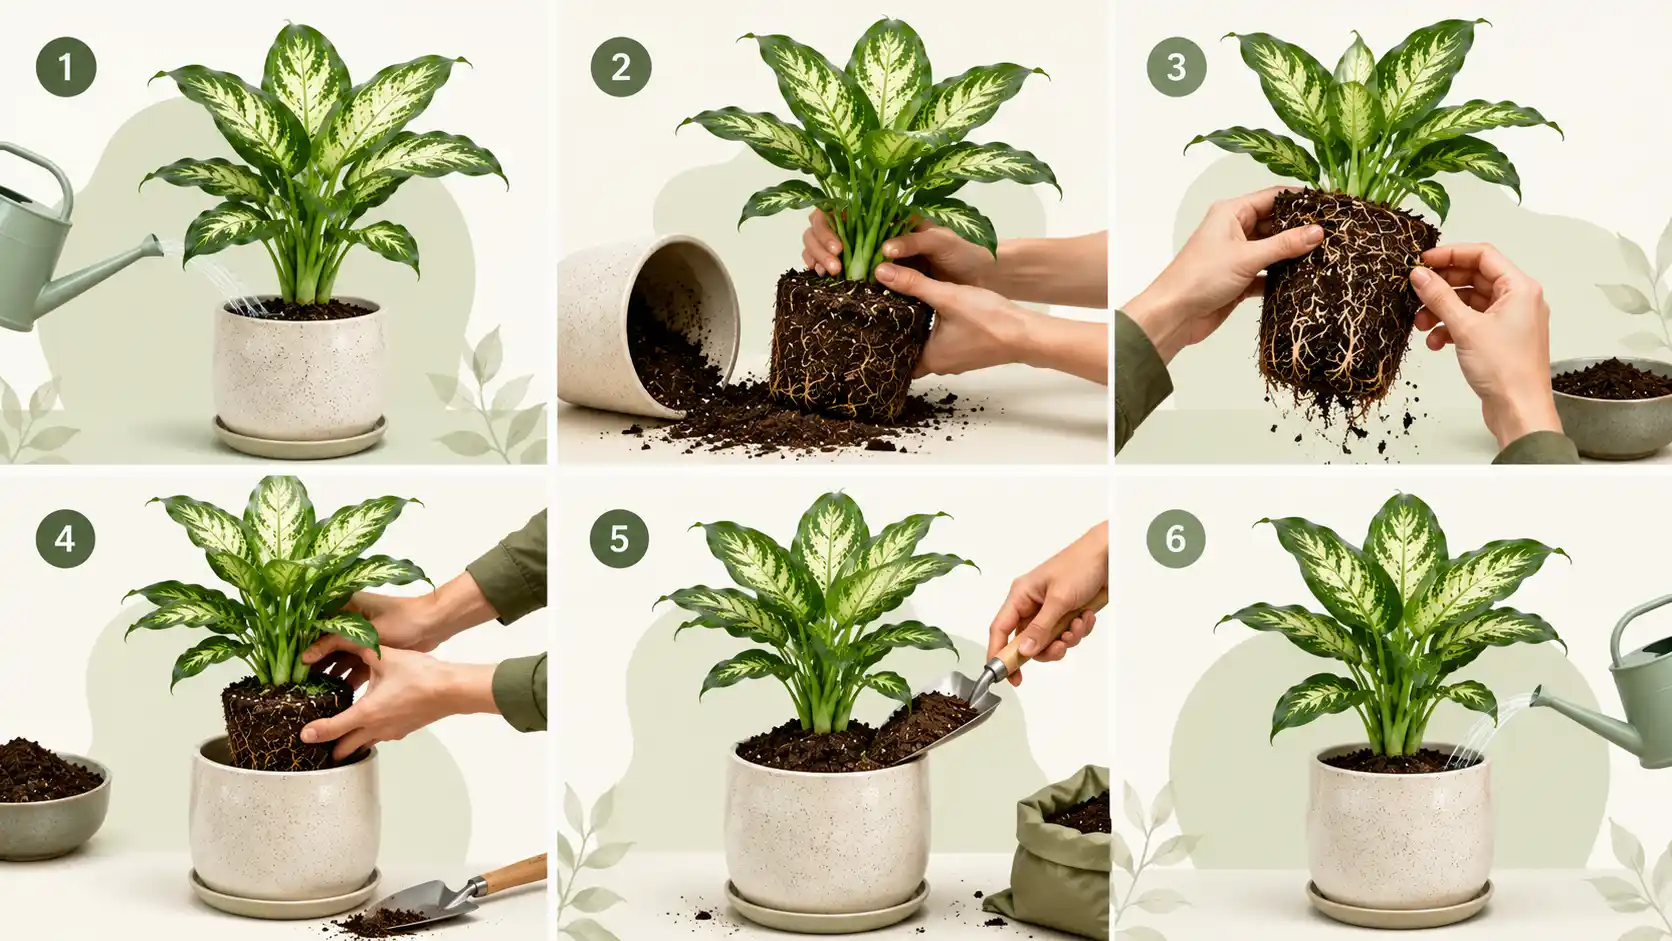
Knowing how to repot Dieffenbachia indoors involves careful handling because the stems and roots can be sensitive. Follow these steps:
- Water the plant a day before repotting
Slightly moist soil makes removal easier and reduces root damage. - Remove the plant gently
Support the stems and carefully slide the root ball out of the existing container. - Inspect and loosen roots
Remove loose old soil and gently separate tightly circling roots. Avoid tearing healthy roots. - Prepare the new pot
Add a layer of fresh soil mix to the bottom of the new container. - Place the Dieffenbachia in the new pot
Position the plant at the same depth it was growing previously. - Backfill with fresh soil
Fill spaces around the roots and lightly press the soil to remove large air pockets. - Allow the plant to settle
Water lightly and place it in suitable indirect light while it adjusts.
Want a printable checklist to follow while you work through these 7 steps? Our Dieffenbachia Repotting Checklist Spreadsheet lays out each stage with space to track pot size, soil mix, and repotting dates.
Should You Water Dieffenbachia After Repotting?
Yes, Dieffenbachia should receive light watering after repotting, but the soil should not become saturated. Proper watering helps settle the roots and removes large air pockets around the root system. Watering habits after repotting are equally important for other tropical plants like Monstera, where maintaining the right moisture balance prevents root problems.
For should I water Dieffenbachia after repotting, the answer depends on soil moisture. If the new soil is already damp, wait briefly before watering again.
Top and bottom watering both have uses:
- Top watering
- Helps evenly moisten fresh soil
- Allows excess water to drain away
- Best for newly repotted plants
- Bottom watering
- Encourages slower moisture absorption
- Useful for very dry soil
- Requires monitoring to avoid prolonged wetness
Common Mistakes When Repotting Dieffenbachia
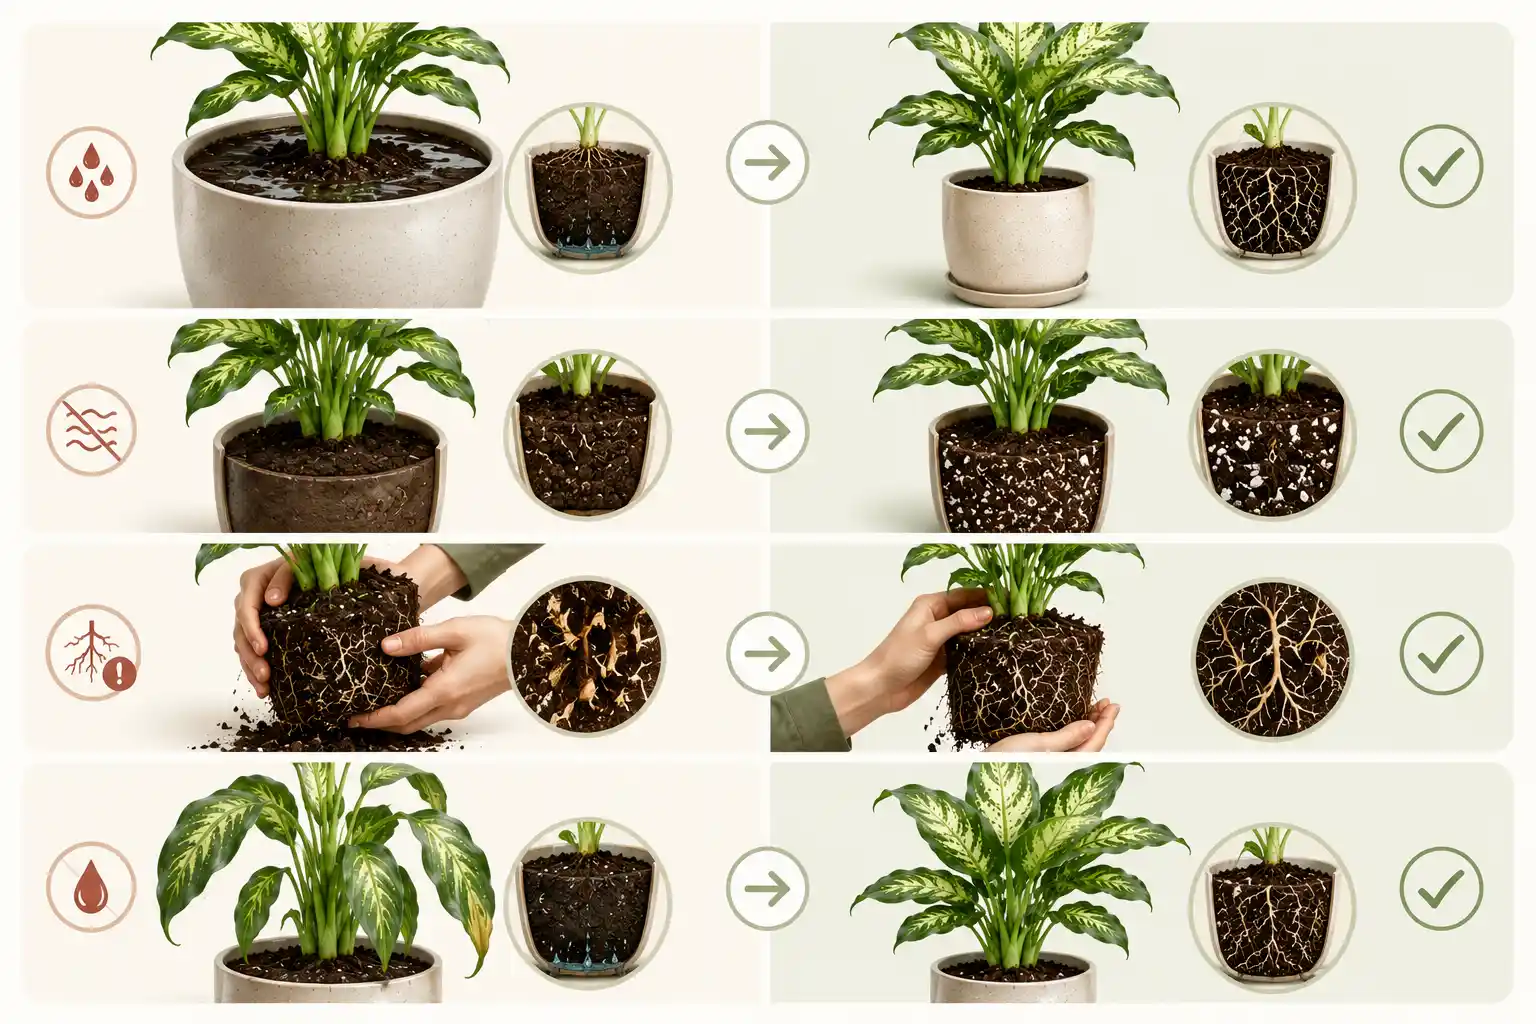
The biggest mistakes when repotting Dieffenbachia involve incorrect pot size, poor watering habits, and unsuitable soil.
Avoid these common problems:
- Choosing a pot that is too large
- Using dense garden soil
- Overwatering immediately after repotting
- Damaging too many roots during removal
- Placing the plant in strong direct sunlight after repotting
- Ignoring drainage requirements
A slightly stressed plant after repotting is normal, but severe drooping or yellowing may indicate incorrect care.
Common Dieffenbachia Problems After Repotting
Common problems with Dieffenbachia after repotting include transplant shock, yellow leaves, drooping stems, and slow recovery. These issues usually happen because roots need time to adjust to their new environment. Fresh potting soil should also be monitored for pests, as indoor plants can sometimes develop issues such as fungus gnats or other soil insects.
Dieffenbachia also has a toxicity concern because its sap contains calcium oxalate crystals that can irritate the mouth and skin. This is an important disadvantage for homes with pets or small children.
Why Leaves Turn Yellow or Droop After Repotting
Leaves may turn yellow or droop after repotting because the plant is experiencing stress.
Common causes include:
- Root disturbance during repotting
- Too much water
- Sudden changes in lighting
- Poor drainage
To fix these problems:
- Allow soil to dry slightly between watering.
- Keep the plant in bright indirect light.
- Remove severely damaged leaves.
- Avoid fertilizing immediately after repotting.
Are Coffee Grounds Good for Dieffenbachia?
Coffee grounds are not necessary for Dieffenbachia and should be used cautiously. While small amounts of composted coffee grounds may add organic material, excessive use can make soil compact and interfere with drainage.
A balanced potting mix is a better choice than relying on coffee grounds as fertilizer.
How to Make Dieffenbachia Bushy After Repotting
To make Dieffenbachia bushy after repotting, focus on proper light, pruning, and healthy root development. A leggy Dieffenbachia usually develops because it is not receiving enough light.
Ways to improve fullness include:
- Move the plant to bright indirect light.
- Prune tall stems to encourage branching.
- Rotate the pot regularly for even growth.
- Maintain consistent watering.
Pruning also helps fix a leggy Dieffenbachia by encouraging new shoots from lower areas of the stem.
Dieffenbachia vs. Other Low-Maintenance Houseplants
Dieffenbachia is considered moderately easy to care for compared with many indoor plants. It requires more attention than extremely hardy plants but rewards proper care with attractive foliage.
| Plant Name | Difficulty Level | Repotting Frequency |
| Dieffenbachia | Moderate | Every 1–2 years |
| Snake Plant | Easy | Every 2–3 years |
| ZZ Plant | Very easy | Every 2–3 years |
| Peace Lily | Moderate | Every 1–2 years |
For a deeper side-by-side view beyond this table, check our Houseplant Repotting Reference Database on Notion. It breaks down repotting frequency, difficulty, and pot preferences for dozens of houseplants in one searchable database.
Dieffenbachia Lifespan and Blooming
The lifespan of a Dieffenbachia can be many years when provided with suitable light, watering, and periodic repotting. Healthy plants often remain attractive indoors for a decade or longer with proper care.
A Dieffenbachia bloom is uncommon indoors but possible. When a Dieffenbachia blooms, it means the plant has reached maturity and has suitable growing conditions. The flowers are less noticeable than the foliage and are not the main reason this plant is grown.
Beginner Mistakes & Troubleshooting
Beginners often focus only on repotting but overlook ongoing care factors. Common issues include:
- Keeping the plant in low light for long periods
- Watering on a fixed schedule instead of checking soil moisture
- Using pots without drainage holes
- Ignoring pet safety because Dieffenbachia sap is toxic
- Placing the plant near cold drafts or extreme temperature changes
Consistent environmental conditions help Dieffenbachia recover and grow successfully after repotting.
Conclusion
Learning how to repot Dieffenbachia correctly helps maintain healthy roots, prevent soil problems, and support long-term plant growth. The best approach is choosing a suitable pot size, using well-draining soil, handling roots carefully, and providing proper aftercare. Repot Dieffenbachia when it becomes rootbound or shows signs of stress, preferably during active growth in spring. With the right technique and consistent care, Dieffenbachia can remain a healthy and attractive indoor plant for many years.
FAQs
When should I repot my Dieffenbachia?
Dieffenbachia should usually be repotted every 1–2 years or whenever roots become crowded. Spring and early summer are the best times because the plant recovers faster during active growth.
Do Dieffenbachia need deep pots?
No, Dieffenbachia do not need deep pots. They grow best in moderately deep containers that provide good drainage and enough space for gradual root expansion.
Should I water Dieffenbachia right after repotting?
Yes, lightly water Dieffenbachia after repotting if the soil is dry. Avoid soaking the plant because disturbed roots are more sensitive to excess moisture.
What are the biggest mistakes when repotting a Dieffenbachia?
The biggest mistakes include using an oversized pot, compact soil, overwatering immediately after repotting, and damaging roots through rough handling.
What is the best potting soil for Dieffenbachia?
The best soil for Dieffenbachia is a well-draining mix containing potting soil, coco coir or peat, perlite, and bark to provide moisture balance and root aeration.
What is the lifespan of a Dieffenbachia?
A Dieffenbachia can live for many years indoors with proper care. Regular repotting, suitable lighting, and correct watering help extend its lifespan.